In today’s digital landscape, data-driven marketing is essential for businesses to succeed online. From tracking user behavior to monitoring conversions and optimizing marketing campaigns, the ability to accurately collect and analyze data is crucial. With so many tools available—Google Analytics, Google Ads, Facebook Pixel, etc.—managing the tags that help track data can quickly become overwhelming. This is where Google Tag Manager (GTM) comes into play, streamlining the entire process of tag management and enabling businesses to operate more efficiently.
Google Tag Manager allows marketers, web developers, and business owners to manage various tracking codes and marketing tags in one central location without the need for constant manual coding. It empowers non-developers to deploy and update tags on websites or mobile apps with ease, giving them more control over marketing campaigns, conversion tracking, and website analytics.
But what makes Google Tag Manager stand out? Aside from its ease of use, GTM offers features like version control, built-in templates, integration with Google Analytics, and advanced capabilities like data layers and server-side tagging. This flexibility allows both beginners and advanced users to utilize GTM to optimize their websites and digital marketing strategies.
This blog will provide you with an in-depth guide on Google Tag Manager—from setting it up to mastering its advanced features, troubleshooting, and best practices. Whether you’re new to the tool or looking to maximize its potential, this comprehensive guide will leave no stone unturned. Let’s dive into everything you need to know about Google Tag Manager.
Read More: Everything You Need to Know About Microsoft Clipchamp
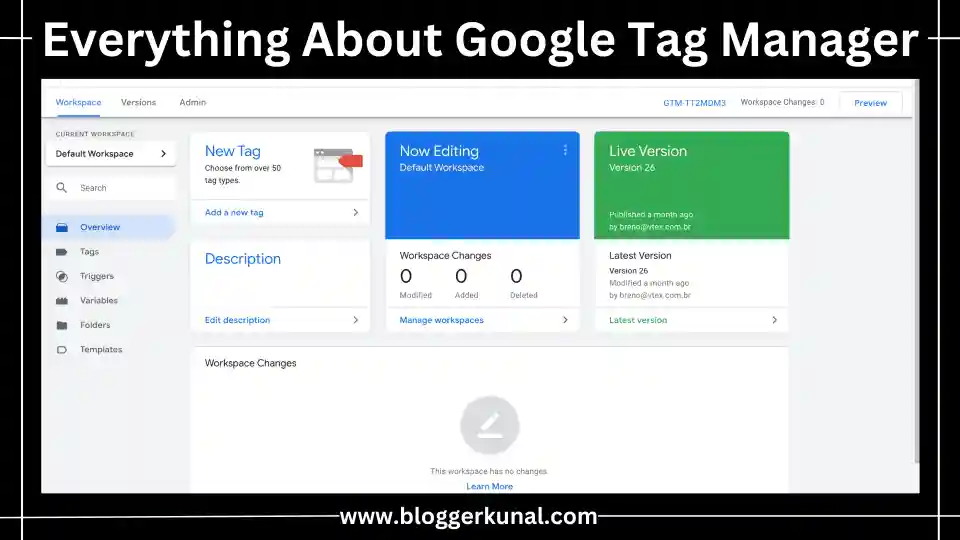
What is Google Tag Manager?
Google Tag Manager is a free tool from Google that allows users to manage and deploy tags (small pieces of code or tracking snippets) on their websites or mobile apps without modifying the source code. In other words, it’s a tag management system (TMS) that helps streamline the process of adding and updating tracking codes.
For example, if you’re running a marketing campaign on Google Ads, you’ll need to add a conversion tag to track the performance of your campaign. Similarly, to track user behavior on your website, you’ll need to integrate Google Analytics. Adding these tags manually can be a complex and error-prone process, especially if you’re not a developer. Google Tag Manager simplifies this by providing an intuitive interface where you can manage and deploy all your tags in one place.
Read More: Everything You Need to Know Google Search Console
Key Features of Google Tag Manager
1. Centralized Tag Management
Instead of adding and updating individual tags in your website’s source code, GTM offers a centralized platform to manage them. This saves time and effort, especially for businesses that run multiple campaigns or use various tracking tools.
2. Ease of Use
Google Tag Manager is designed to be user-friendly, even for those with limited technical knowledge. Once the GTM container is installed on your website, you can manage tags without needing a developer to modify the code. GTM provides built-in templates for popular tags such as Google Analytics, Google Ads, and Facebook Pixel, making it easier to deploy these tags with just a few clicks.
3. Version Control
One of the most important features of Google Tag Manager is its version control system. Every time you make changes to your tags, GTM creates a new version of your container. This allows you to easily roll back to a previous version if something goes wrong, providing a safety net for any potential issues.
4. Preview and Debug Mode
Before publishing your tags, you can use GTM’s built-in Preview and Debug mode to test them and ensure they’re working correctly. This feature allows you to see which tags are firing and how they interact with your website, giving you more confidence that everything is set up properly.
Read More: Everything You Need To Know About AnswerThePublic
5. Asynchronous Tag Loading
Tags deployed via Google Tag Manager are loaded asynchronously, meaning they won’t slow down your website’s loading times. This is particularly important for optimizing website performance and user experience.
6. Triggers and Variables
GTM allows you to define triggers and variables that dictate when and where a tag should fire. For example, you can set up a trigger to fire a tag when a user clicks on a specific button, submits a form, or lands on a particular page. Variables provide additional customization, such as tracking the URL of the page where the tag was fired or capturing a user’s actions in greater detail.
7. Custom Templates
While GTM offers a wide variety of built-in tag templates, it also supports custom templates, giving users the flexibility to integrate virtually any third-party tool or service. You can create your own templates or use community-developed templates for specific use cases.
Read More: Everything You Need to Know About Microsoft Clarity
How to Set Up Google Tag Manager
Setting up Google Tag Manager is a straightforward process that requires a few key steps. Here’s a step-by-step guide to get started:
Step 1: Create a Google Tag Manager Account
Go to the Google Tag Manager website and sign up for an account. Use your Google account and provide basic details like your website’s name and domain.
Step 2: Create a Container
A container holds all your tags, triggers, and variables. Each website or mobile app you manage will have its own container. Once created, Google Tag Manager will generate a unique container code that needs to be installed on your website.
Step 3: Install the GTM Code on Your Website
Copy the container code and paste it into your website’s HTML. It should be placed in the <head> and <body> sections of every page you want to track. For mobile apps, specific SDKs are available for both Android and iOS platforms.
Step 4: Add Tags
With the container set up, you can now add tags. Start by adding a common tag, such as Google Analytics. Use the built-in templates to simplify this process, select the relevant trigger (e.g., page views), and then configure the tag settings.
Step 5: Test Your Tags
Always use the Preview and Debug mode to test your tags before going live. This allows you to see which tags are firing and ensures everything is working as intended.
Step 6: Publish Your Container
Once you’re satisfied with your tags and triggers, hit the Publish button to make them live. Your tags will now fire according to the triggers you’ve set.
Read More: Bing Webmaster Tools Complete Guide
Advanced Features of Google Tag Manager
1. Data Layer
The data layer is a powerful feature in Google Tag Manager that acts as a bridge between your website and GTM. It allows you to store and pass data (such as product details, user actions, or page categories) to GTM tags, giving you more control and precision over your tracking setup.
For example, if you’re running an eCommerce website, you can use the data layer to capture purchase information, product IDs, or shopping cart details. This data can then be passed to Google Analytics, Facebook Pixel, or any other marketing tool you’re using.
2. Server-Side Tagging
While most GTM users rely on client-side tagging (where tags are fired from the user’s browser), server-side tagging is an advanced feature that moves the tag firing process to your server. This improves data security, enhances website performance, and allows for better control over third-party tracking scripts. Server-side tagging is particularly useful for websites handling sensitive information like payment data or personally identifiable information (PII).
3. Consent Mode for GDPR Compliance
As privacy regulations like GDPR and CCPA have become more prominent, Google Tag Manager introduced Consent Mode to help businesses comply with data privacy laws. Consent Mode allows you to adjust how your Google tags behave based on a user’s consent status, ensuring that tracking scripts only fire when consent has been granted.
4. Tag Sequencing
Tag Sequencing lets you specify the order in which tags should fire. This is especially useful when a particular tag depends on the completion of another tag. For example, you might want to ensure that a tracking pixel only fires after a page view tag has completed.
5. Event Tracking
By utilizing Google Tag Manager’s event tracking capabilities, you can set up triggers to track user interactions such as button clicks, video views, form submissions, and more. This data can be passed to Google Analytics or other analytics platforms, giving you valuable insights into how users are interacting with your site.
Read More: Google Analytics Complete Guide
Common Challenges and Solutions
While Google Tag Manager is a powerful tool, users may face some challenges. Below are a few common issues and solutions to help overcome them.
1. Understanding Triggers and Variables
Setting up the right triggers and variables can be a bit confusing for new users. Make sure to start with simple triggers like page views, then gradually experiment with more specific ones like click or form submission triggers. Similarly, use GTM’s built-in variables before creating custom ones, which might require a deeper understanding of JavaScript.
2. Tag Overload
One of the common mistakes is overloading your website with too many tags. Each tag you add contributes to your website’s overall load time, so it’s crucial to keep an eye on the number of tags being deployed. Regularly audit your tags and remove any that are no longer needed or relevant.
3. Tag Firing Issues
Sometimes, tags may not fire correctly. This could be due to issues with the triggers, variables, or other misconfigurations. Always use the Preview and Debug mode to troubleshoot firing issues before publishing your container.
Read More: Everything You Need To Know About Google PageSpeed Insights
Conclusion
Google Tag Manager is an invaluable tool for managing and deploying tags on websites and mobile apps. It simplifies the process of adding and updating tracking codes, allowing non-developers to manage tags with ease. Whether you’re using basic tags like Google Analytics or implementing advanced features like data layers and server-side tagging, GTM provides flexibility, control, and efficiency for any digital marketing strategy.
By mastering Google Tag Manager, you can ensure accurate data collection, optimize your marketing campaigns, and enhance your website’s overall performance. Whether you’re a small business or a large enterprise, GTM is a must-have tool in your marketing technology stack.
Read More: Everything About SEOquake: A Comprehensive Guide
Frequently Asked Questions (FAQs)
What is Google Tag Manager used for?
Google Tag Manager is used for managing and deploying tracking codes or tags (such as Google Analytics, Google Ads, Facebook Pixel, etc.) on websites and mobile apps without needing to modify the website’s code.
Is Google Tag Manager free?
Yes, Google Tag Manager is a free tool provided by Google for managing tags on websites and mobile apps.
How is Google Tag Manager different from Google Analytics?
While Google Tag Manager helps manage various tags, Google Analytics is a specific tool used to track website traffic and user behavior. GTM allows you to easily deploy Google Analytics tags, along with many other third-party tags.
Can I use Google Tag Manager with a non-Google tool?
Yes, Google Tag Manager supports custom tags, meaning you can integrate it with virtually any third-party tool or service, not just Google products.
What is a data layer in GTM?
The data layer is a JavaScript object that stores information on your website or app, which Google Tag Manager can then use to trigger tags or pass data to other tools like Google Analytics.
What happens if I make a mistake with GTM?
GTM’s version control system allows you to roll back to previous versions, providing a safeguard against mistakes. You can also test changes using Preview and Debug mode before publishing them live.
Can GTM slow down my website?
Google Tag Manager uses asynchronous tag loading, meaning it won’t block your website’s content from loading. However, deploying too many tags or poorly optimized tags can affect website performance, so it’s important to audit and manage tags properly.
What are the benefits of using server-side tagging?
Server-side tagging offers several benefits, including improved website performance, enhanced data security, and greater control over third-party scripts. It shifts the tag firing process from the user’s browser to your server, reducing the amount of code that runs on the client side.
How do I test if my tags are working?
Use Google Tag Manager’s built-in Preview and Debug mode to test your tags. This feature lets you see which tags are firing on your website, and helps you troubleshoot any issues before going live.
Do I need coding knowledge to use Google Tag Manager?
While some coding knowledge can be helpful for advanced use cases, Google Tag Manager is designed to be user-friendly. Built-in templates and an intuitive interface allow users with minimal technical skills to manage and deploy tags.